Importing your data
Move deals, contacts, and properties from your old CRM in one upload — so your team is productive from day one instead of re-keying history.
What this does
Open /{your-workspace}/settings/migration, choose the system you are leaving, upload a CSV export, and XchangeHero maps rows into properties, contacts, and deals. You get a live summary of how many records were created plus any warnings to review.
Where to go
From Settings, open Data import (or use the same shortcut from the welcome tour). Admin access is required for migration in most workspaces — if you cannot see the page, ask an admin to run the first import or grant you rights.
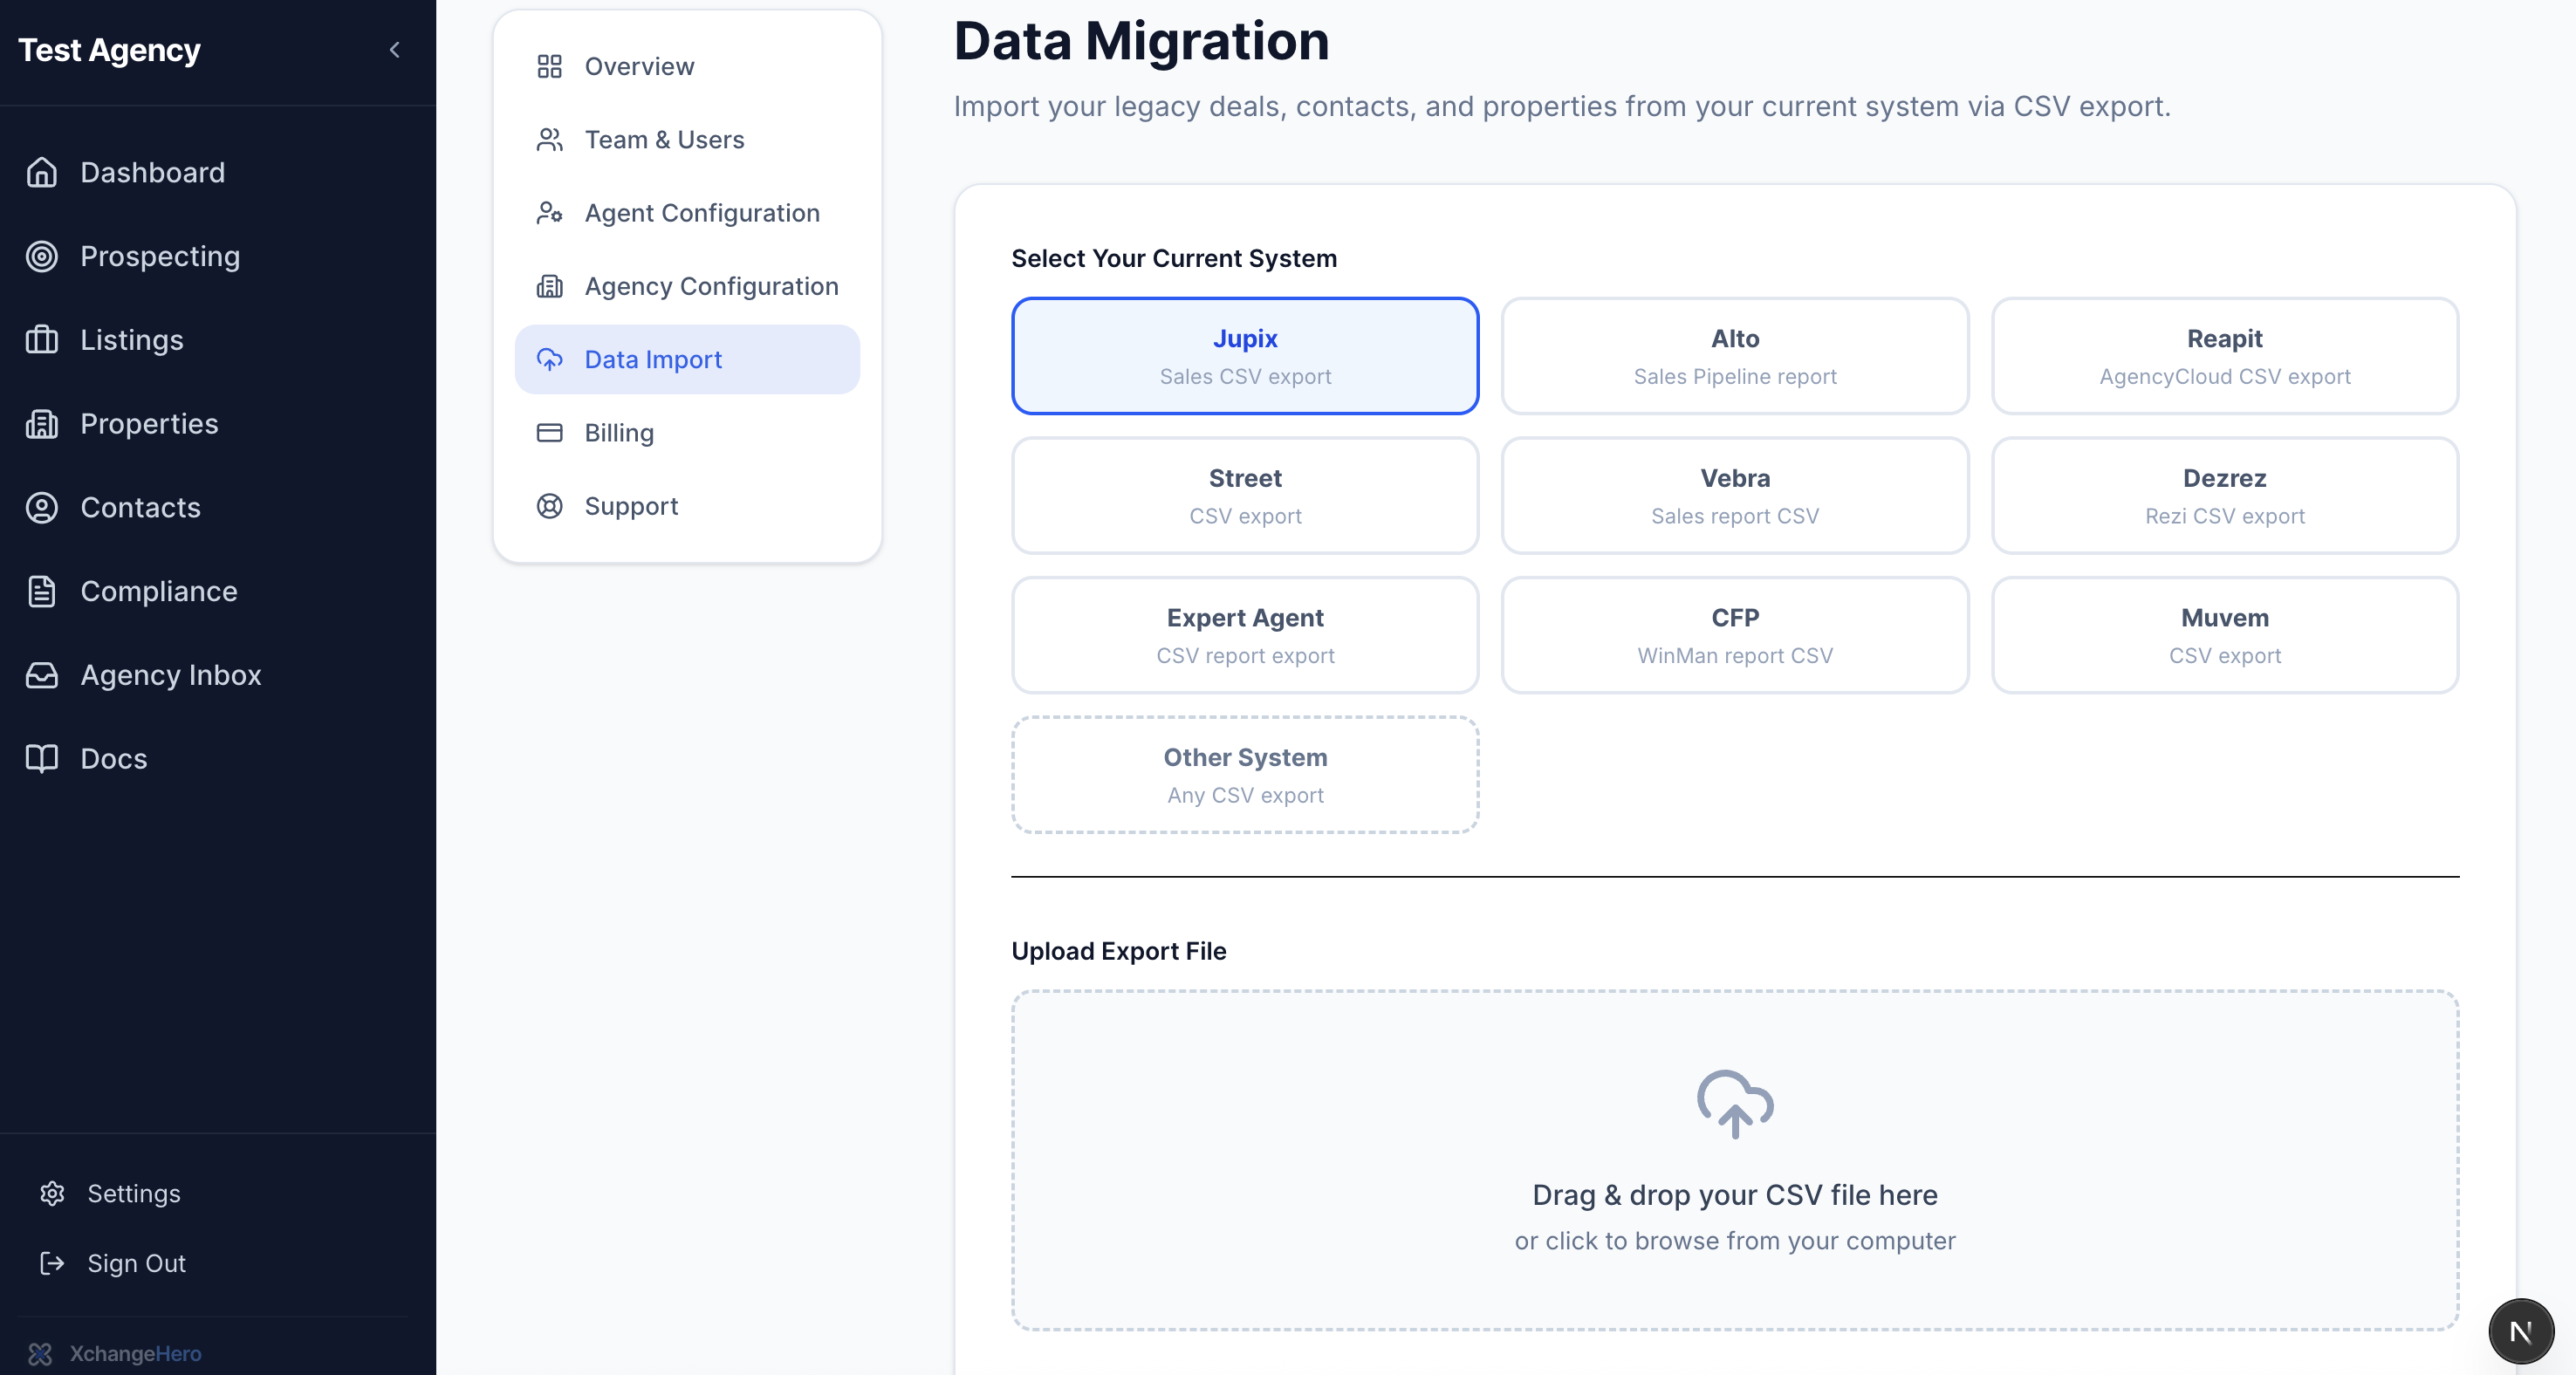
The migration landing screen: headline, short explanation, and the source-system picker.
Supported sources
Pick the option that matches how you exported the file. Each label in the product matches a parser tuned for that vendor's column layout:
- Jupix — sales CSV export
- Alto — Sales Pipeline report
- Reapit — AgencyCloud CSV export
- Street — CSV export
- Vebra — sales report CSV
- Dezrez — Rezi CSV export
- Expert Agent — CSV report export
- CFP — WinMan report CSV
- Muvem — CSV export
- Other system — generic CSV template
Before you upload
Export a fresh CSV from your legacy system — stale extracts often miss chain parties or duplicate merged contacts. Keep the file unopened in Excel if possible; some spreadsheet tools strip leading zeros from postcodes.
Uploading the file
Select your source system, then choose the CSV from disk. A single file per run keeps errors easy to trace. While processing, the UI shows a loading state — large files may take a minute.
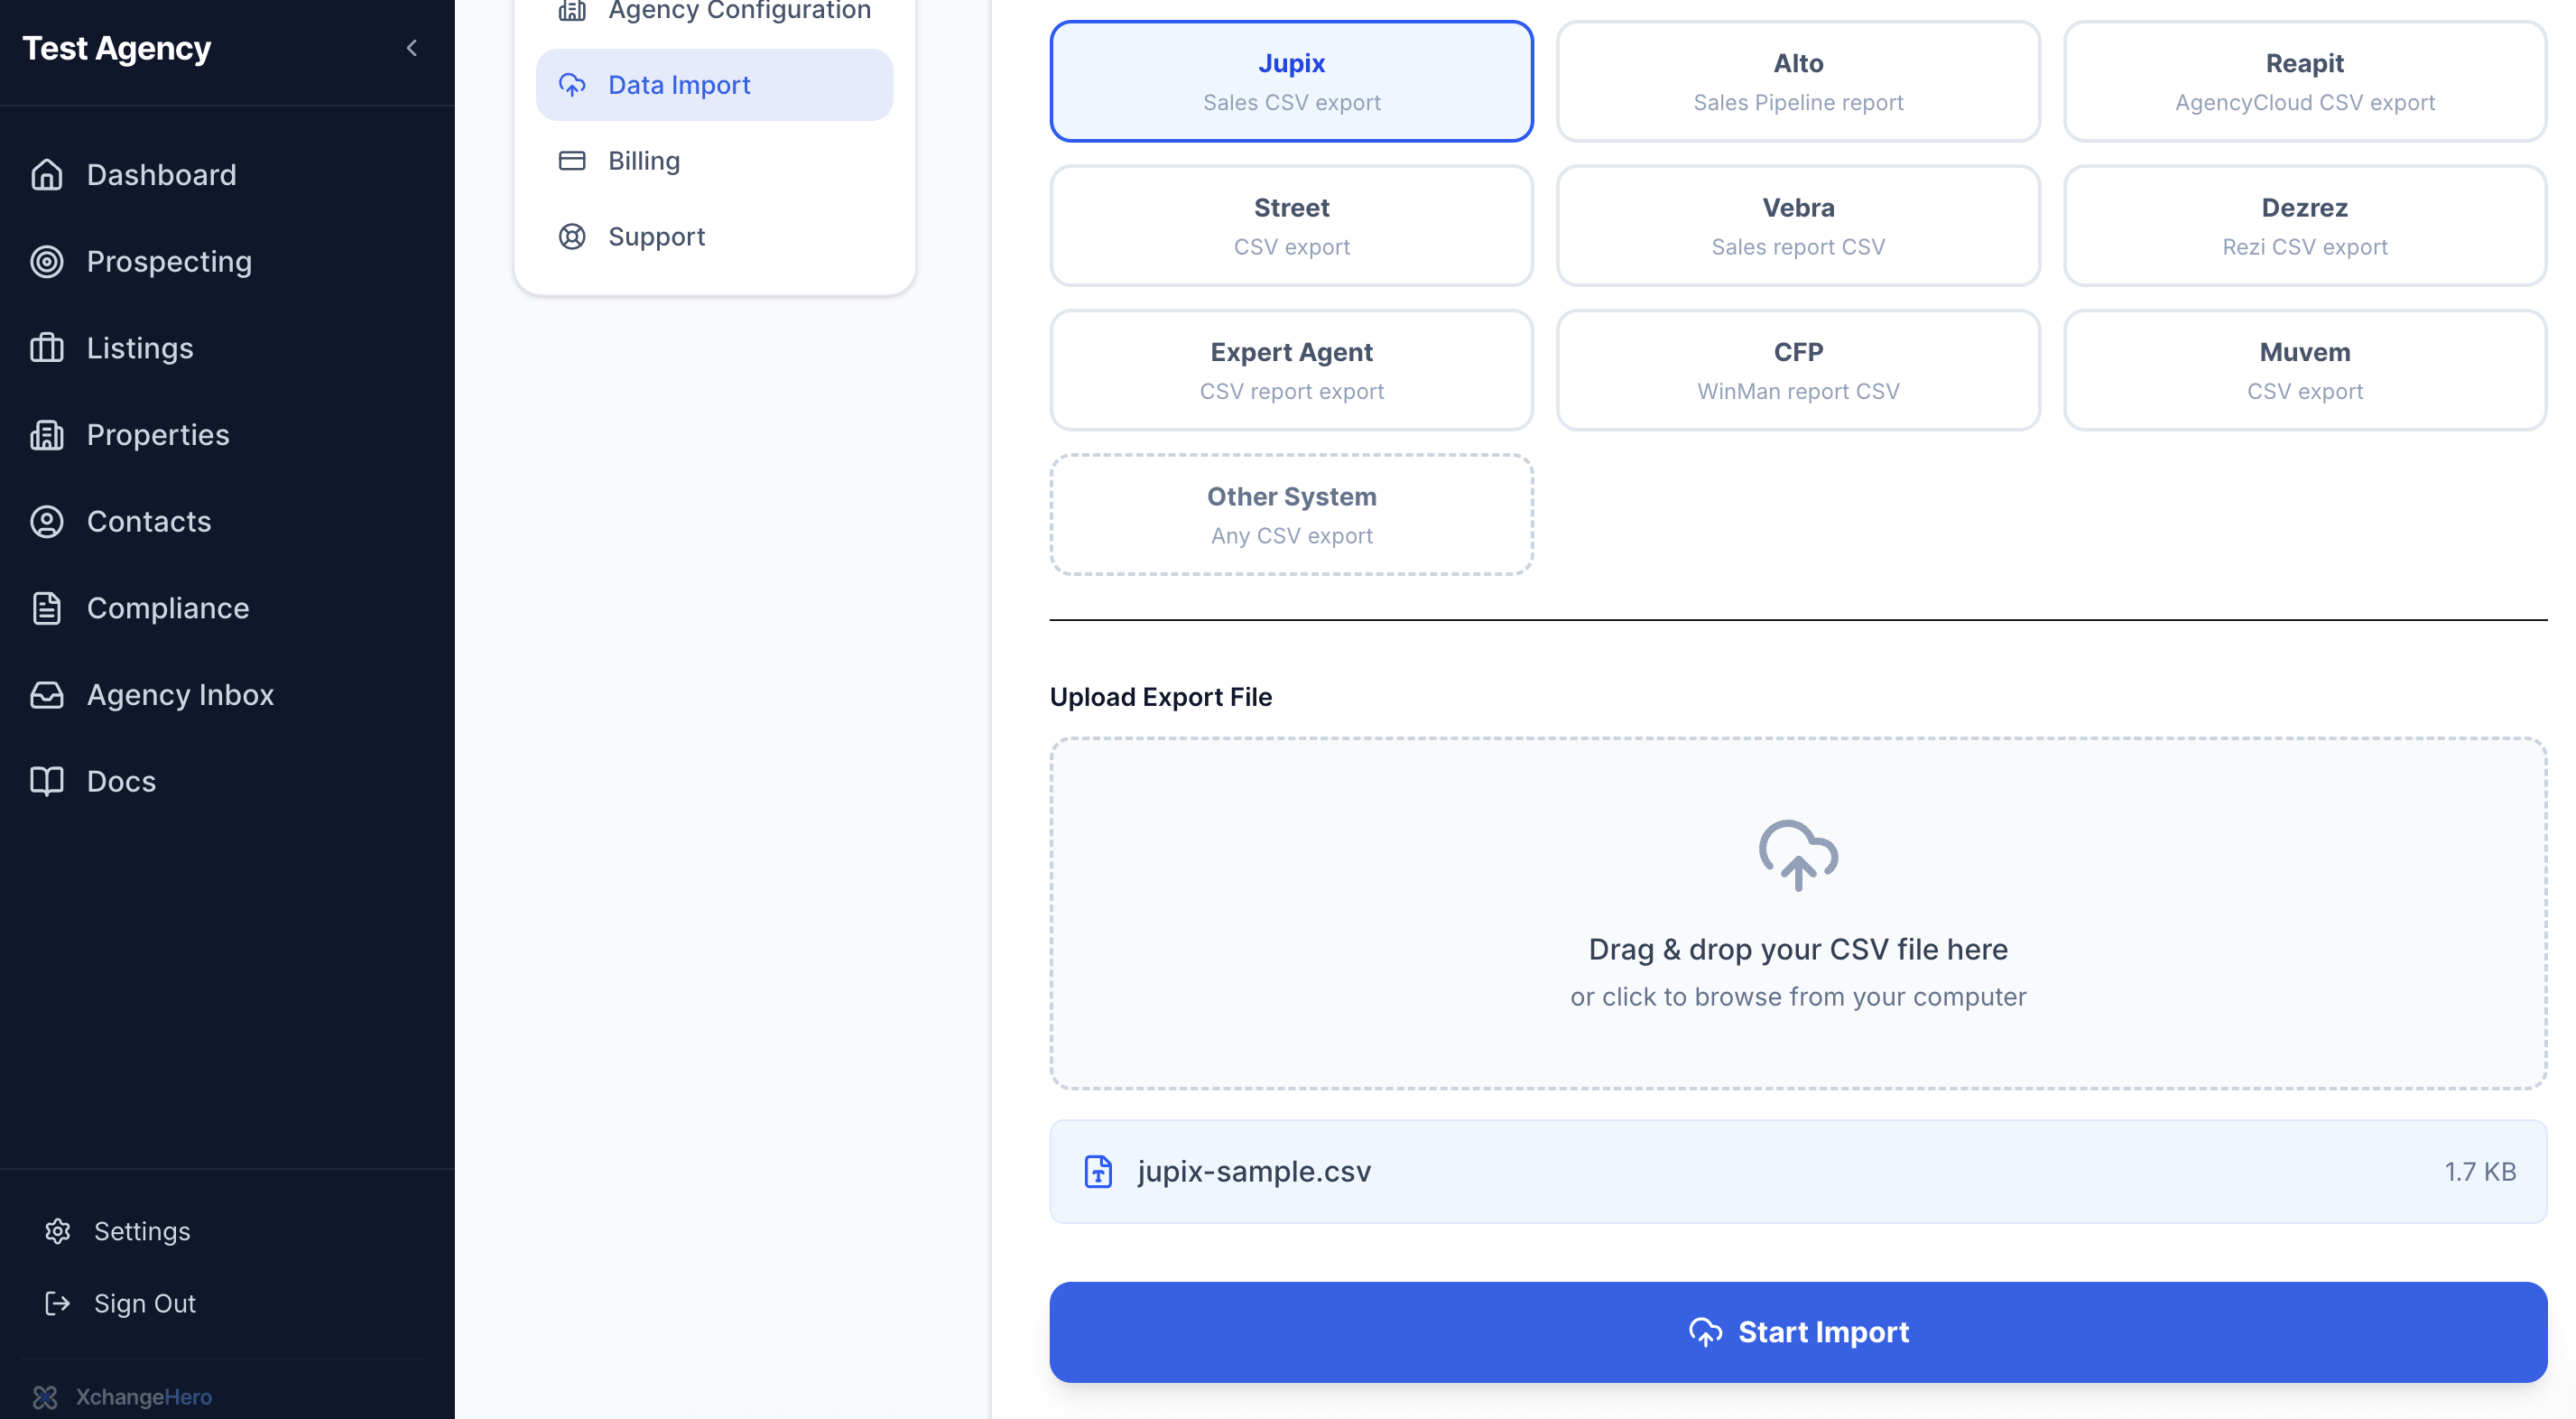
File picker filled, source system highlighted, primary import button visible.
After import: counts and warnings
On success you will see how many deals, contacts, and properties were created. Non-fatal issues surface as warnings — read them before you assume the database is perfect (e.g. duplicate addresses merged, rows skipped for missing keys).

Green success state with numeric summary; optional warning list expanded.
What happens next
Imported listings appear in your workspace with the same rules as manually created records — you can open progression boards, attach compliance evidence, and run buyer matching as soon as applicant profiles exist.
Pro tip
Run import before you invite the full team — fewer people online means fewer concurrent edits while baseline data lands.